How to install Visual Studio code
Visual Studio Code for Windows
It is a free source-code editor made by Microsoft for Linux, Windows, and mac OS. VS Code has support for debugging, syntax highlighting, intelligent code completion, snippets, code refactoring, and embedded Git. Users can change the theme, add keyboard shortcuts, edit preferences, and install extensions to add functionality.
Step 1 :
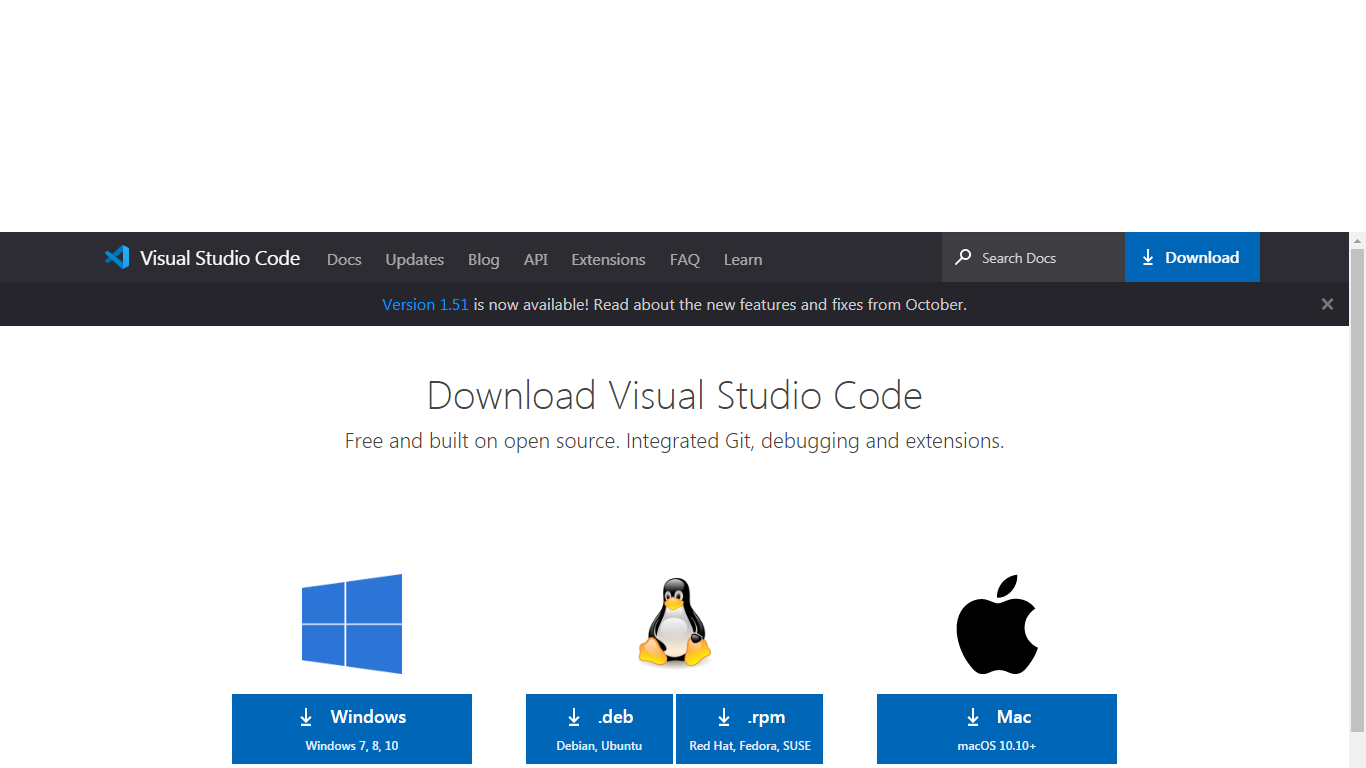
- Download VS code from here Link.
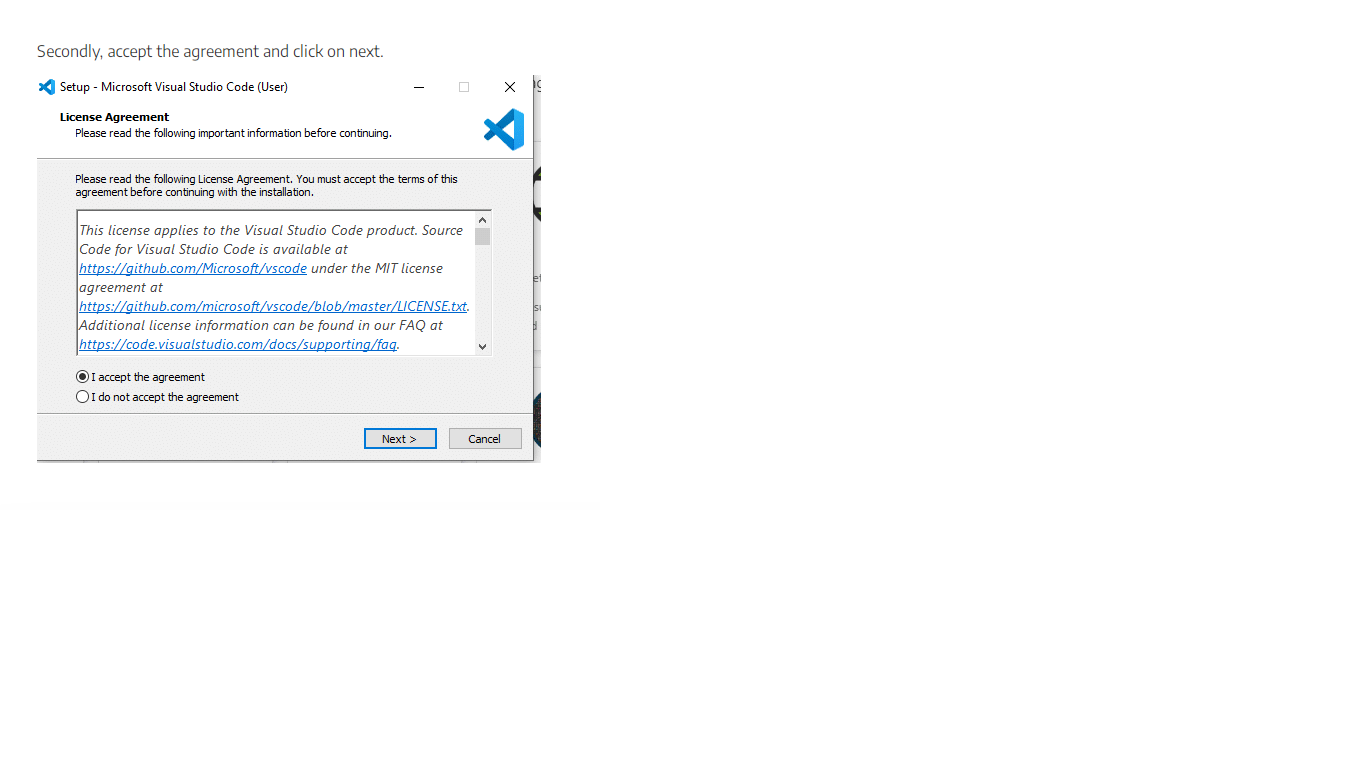
Step 2 :
Download the Visual Studio Code installer for Windows. Once it is downloaded, run the installer (VSCodeUserSetup-{version}.exe). Then, run the file – it will only take a minute.
Accept the agreement and click “next.”
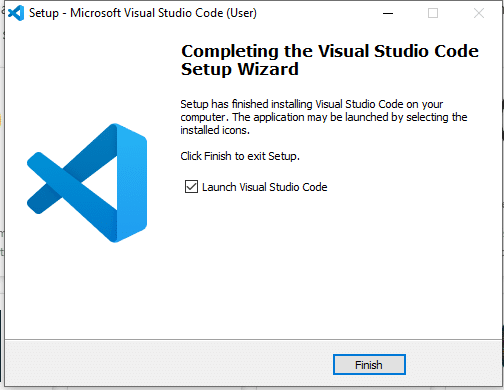
- After accepting all the requests press finish button. By default, VS Code installs under: "C:\users{username}\AppData\Local\Programs\Microsoft VS Code."
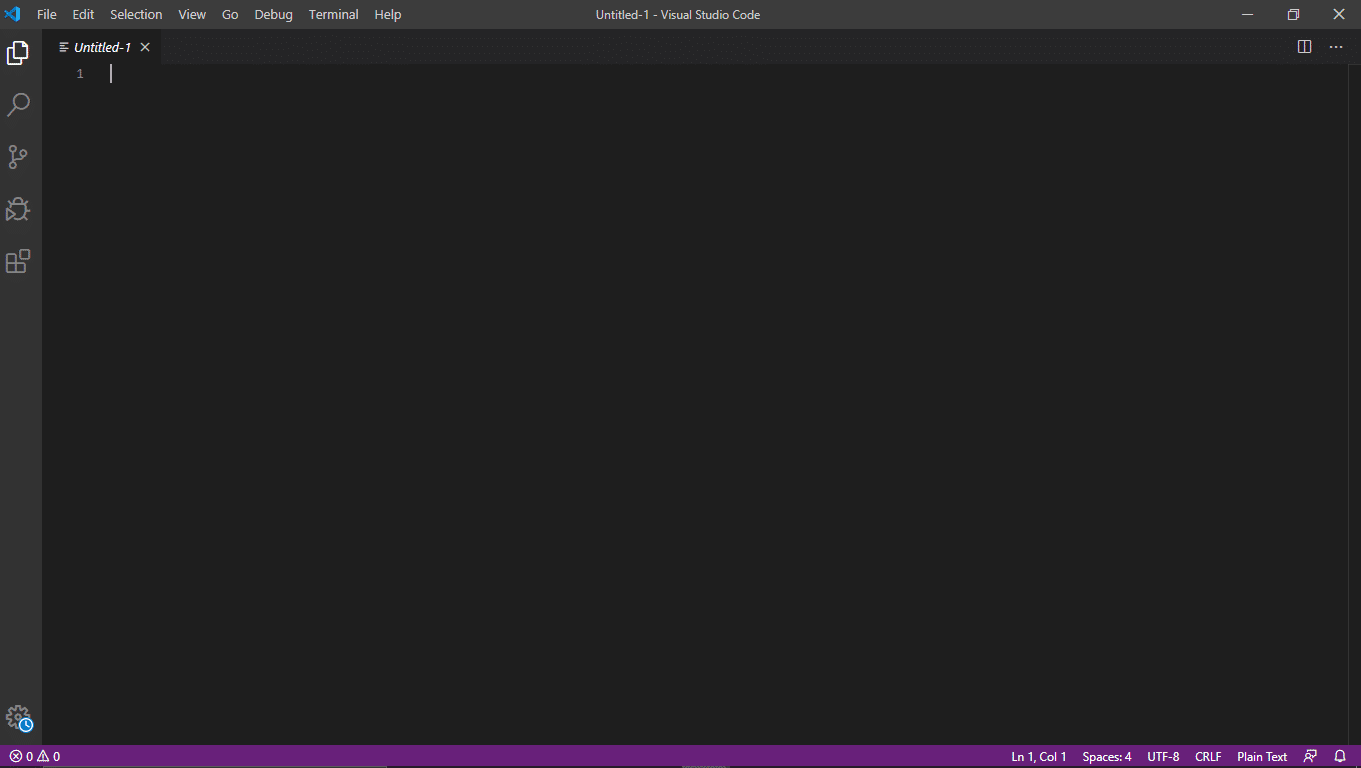
- If the installation is successful, you will see the following:
Visual Studio Code for Windows for Mac
To install visual studio code on mac:
- Download Visual Studio Code for Mac.
- Double-click on the downloaded archive to expand its contents.
- Drag Visual Studio Code.app to the Applications folder, making it available in the Launchpad.
- Add VSCode to your Dock by right-clicking on the icon and choosing Options Keep in Doc.
After installing the VS Code, we can also configure the code to open from a command line, and it is pretty darn easy for us to do that.
- Launch Visual Studio Code.
- Open the Command Palette (⇧⌘P) and type ‘shell command‘ to find the Shell Command: Install the ‘code’ command in the PATH command.
Now, if you have created any project that goes into that folder and hit the following command to open that project into the Visual Studio Code.

Post a Comment