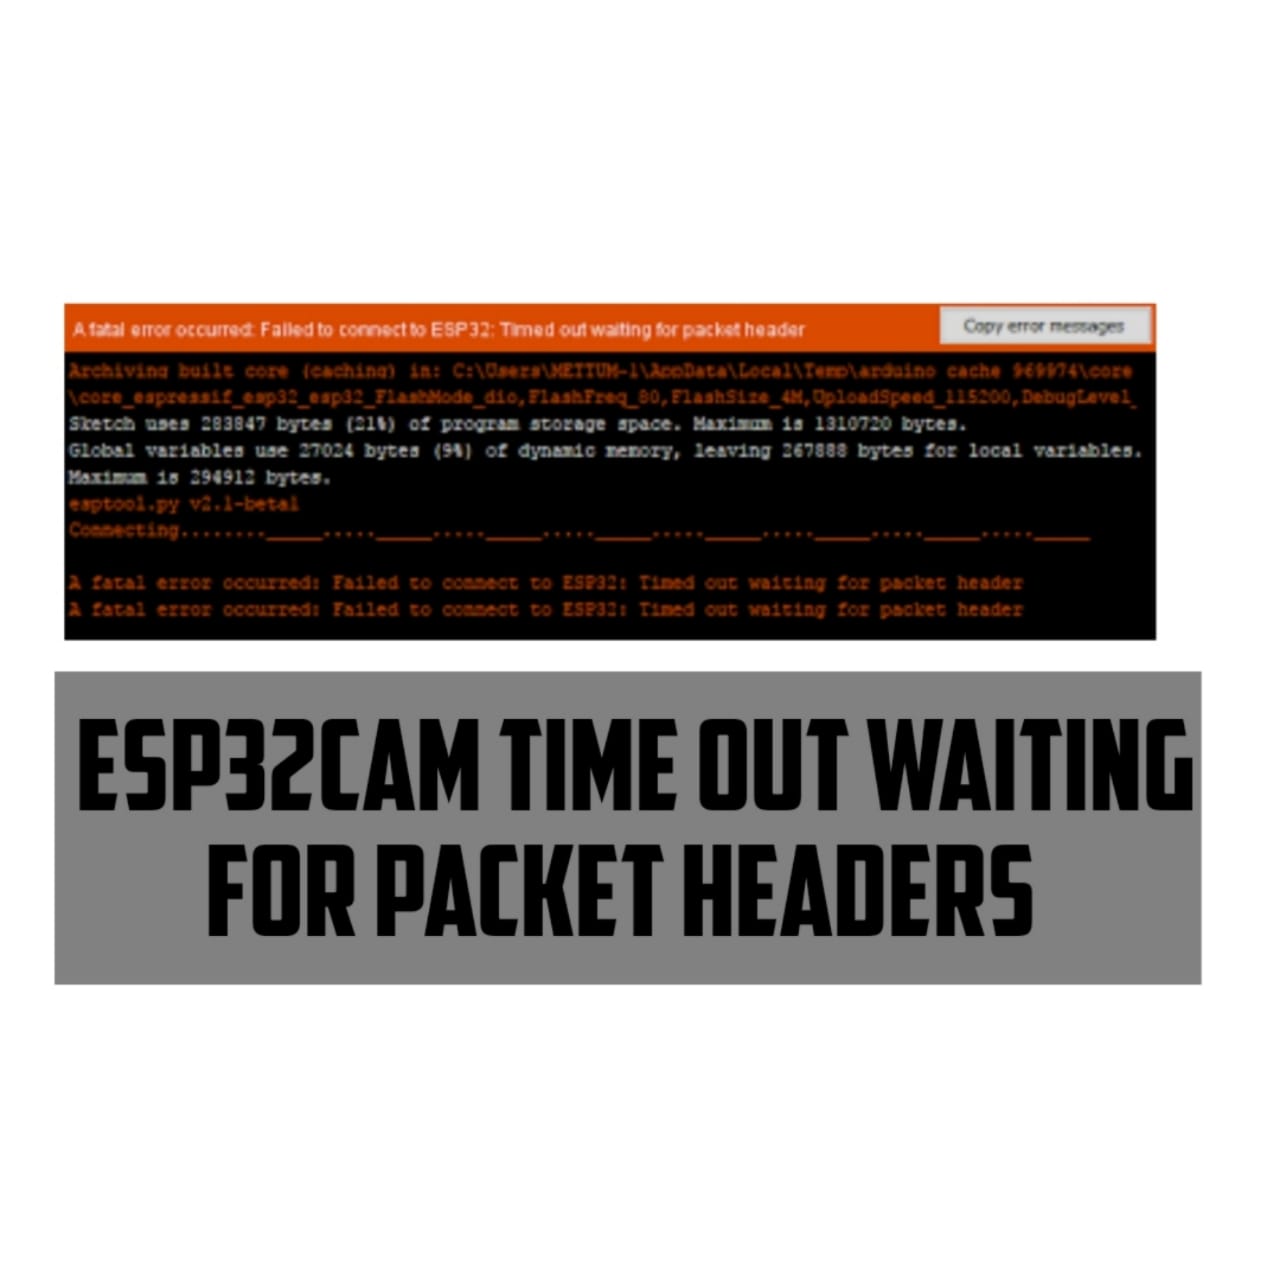
A fatal error occurred: Failed to connect to ESP32: Timed out waiting for packet header
The ESP32-CAM is a very small camera module with the ESP32-S chip that costs approximately $10. Besides the OV2640 camera, and several GPIOs to connect peripherals, it also features a microSD card slot that can be useful to store images taken with the camera or to store files to serve to clients.
Connections:

1. Install the ESP32 add-on
2. CameraWebServer Example Code
In this example, we use Arduino IDE to program the ESP32-CAM board. So, you need to have Arduino IDE installed as well as the ESP32 add-on. Follow one of the next tutorials to install the ESP32 add-on, if you haven’t already:
In your Arduino IDE, go to File > Examples > ESP32 > Camera and open the CameraWebServer example.

Configurations :

- Connecting ESP32 with FTDI programmer
ESP32cam board is interfaced with OV2640 camera with GPIO pins
Connect the EP32cam board with FTDI programmer since it is not a UmSB port for TTL serial transmission of USB signals.
GPIO 1 and 3 pins are serial pins and use these pins to upload the code to the hardware board. GPIO 1 and 3 are the serial pins and ID0 is connected to GND. ESP32 will be in flashing mode
Installation
There is an add-on which allows you to program ESP32 with Arduino IDE and programming languages. The following can be performed to achieve the above:
In the Arduino IDE, go to FILE > Preferences
Additional board manager inside URL
Install ESP32 BY Espressif Systems: https://dl.espressif.com/dl/package_esp32_index.json
Board : Esp32 Worever module(Windows) / DOIT ESP32 DEVKIT V1(mac)
Upload Speed : 115200
Flash Frequency : 40MHz
Flash Mode : QIO
Partition Scheme : Huge App ( 3mba no OTA)
Programmer : AVR ISP
Upload the code.
Press the on board reset button for ESP32 in flashing mode to be set.
After Uploading the code disconnect ID0 from GND
- Open the serial Monitor at a baud rate of 115200. The ESP32 IP address should be printed on the serial monitor.
